Friday, March 16, 2012

Can you say Peach Parfait?

As I sit here eating my ice cream (yum) I'm thinking that the name Peach Parfait sounds pretty good as a name for ice cream!  I recently challenged myself to start using colors I normally don't.  Peach Parfait is a color that I've had trouble with - so I found some combinations that work and created the projects on today's post.   (Club gals - here are our projects!)


Here is another jar made with the Lace Doily Die cut, my previous post used a different color combo on this.  Even tho it takes a few extra seconds to get all the tiny pieces out, it's not too bad and the end result is really gorgeous!

The Blossom Punch flower card (I got the idea straight from SU's Stampin' Success magazine) was pretty quick to put together.  Just punch the flowers in different colors, (Peach Parfait and Not Quite Navy) add the center with a dimentional and a brad for the middle flower.  The 'love life, live life' sentiment is from 'You're a Gem' stamp set from Stampin' Up! and the zig zag trim is made with the Big Shot and the die Tasteful Trim.


This idea was CASED from Shelli Gardner's website 'soshelli'.  For those of you who don't know who she is, she's the founder of Stampin' Up! and a VERY crafty lady!  Love this elegant bird die cut!


I just added a button, some lace and a bow.  Oh - and the Peach Parfait scalloped edge on the bottom.


Tuesday, March 13, 2012

Lace Doily Jar

Here is a cute gift idea - it's a pint jar covered with Stampin' Up!'s new Doily Die Cut.
The idea came from Lisa Young's Bridal Set on SCS (addinkandstamp), but I used a few different elements.
I added a crushed flower using the 5-Petal Punch and the new Blossom Punch, then a couple of layers made with the new Labels Framelits.   The 5-Petal Punch gives this flower a little different look from the ones made with the Scallop Punch because the center flowers are pointed.


I'm thinking this would be fun to fill with the pastel bird eggs for Easter! 
(the malted milk ball kind - yum!)


Close up of doily and layers.  The ribbon is from Sale-a-Bration. 


Club gals:  we will be making this on Monday : )

Saturday, March 3, 2012

Framelit Bag Set

Check out this bag! 


This is the full set from my previous post using Stampin' Up's new Label Framelits from the Occasions Mini Catalog.  The distressed edges and First Edition DSP give it a great 'vintage' feel. 

The little 3x3 cards and envies fit nicely inside : ) 
Fun-Fun!

As promised in an earlier post, I am offering a tutorial for $2.95 with complete instructions on how to create this Framelit Bag Set.  Just click on  the 'Buy Now' button in the upper right corner of my blog and I will email you the 23-page tutorial with over 75 photos as a pdf file detailing each easy-to-follow step.

SU demonstrators - this would be a great set to do for a class!  : )

Sunday, February 12, 2012

Framelit Bag

Stampin' Up!'s new Label Framelits are FABULOUS!!  Very versatile and the possibilities are endless!
I used 2 of the largest size label, added a box in the middle and made a bag.  The cardstock is Poppy Parade and So Saffron - those colors really go together well.

Look closely and you will see the Elementary Elegance stamp set used in the middle.  I added a flower using the scalloped punch and the new Blossom punch.  Been making lots of those flowers lately - really dresses ANYTHING up!!


The layers are made from Calypso Coral CS and First Edition DSP.

I am currently working on a tutorial for this bag and matching 3x3 notecards.  It is almost complete so check back for details!

Saturday, January 28, 2012

New and Improved Sucker Holders!


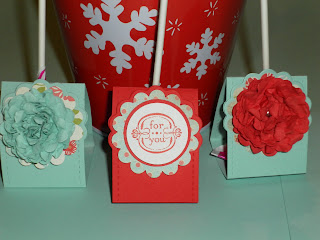
These sucker holders are a step up from my earlier post, and are very easy to make!


I used the Two Tags die cut for the Big Shot but folded the paper before I ran it through.  This way I made one long tag with two scalloped ends.  This improved version has different folds so it stands up much better.  Below is a short tutorial on how I made these. 
(I apologize in advance for the dark photos.)


Fold a piece of cardstock 8 1/2" by 2 1/4" in half.  Using the Two Tags die cut, place the cardstock's fold about 1/4" inside the bottom end of the small tag.  This way the end does NOT get cut.


The open end of the cardstock should be on the scallops.  Run through the Big Shot.


It should look like this.


Score and fold 1 3/4" to the left of Center Fold as shown.  Then score and fold 2 1/4" to the right of Center Fold.


Punch a hole in the center of the fold to the right as shown above.


Insert sucker stick through hole. Fold top scallop down first and then fold bottom scallop up.


Adhere with dimensionals.


Punch a scallop circle from designer paper. 
Add to holder, layering just below the holder's scallops as shown.


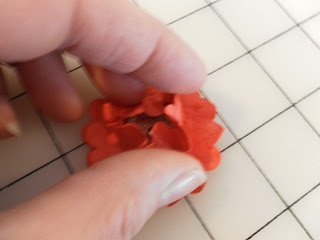
Create scalloped circle vintage flower by crushing layers of the scalloped circle as shown below.  (see my Jan. 15th post for information on creating these flowers and matching purse.)


Add the distressed vintage flower using dimentional.


A simple scalloped piece of designer paper layered with a greeting can be used instead of a vintage flower. Below I used the scallop punch, 1 3/8" circle punch and a 1" punch. 


The greeting "for you" is from Elements of Style and the DSP is Everyday Elegance from Sale-a-bration; both from Stampin' Up!   Dimensionals can be used in between layers to add height.


The completed holders.


Now that you've seen how it's done - give it a try!  These would make wonderful valentine treats!

Sunday, January 22, 2012

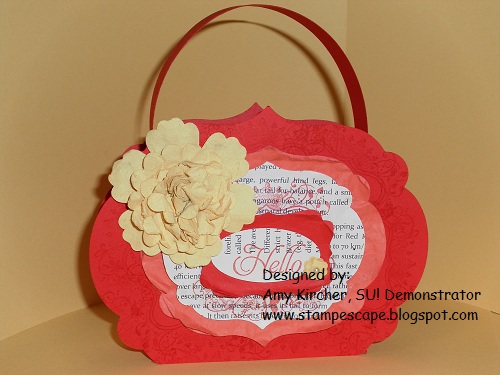
Poppy Parade Vintage Purse

These purses are so fun to make!  Here's another one made with Poppy Parade cardstock.  The DSP is Everyday Elegance from the Sale-a-Bration mini.


The inside is a simple box in between the two outside panels.  


If you are interested in step-by-step directions scroll down for more information on the tutorial that is available.

All Matchy-Matchy!

Here is what we are making at Stamp Club tomorrow night!


It's a card and 2 treats that are all Matchy-Matchy.  I started out with the intention of doing something for Valentine's day that maybe had non-traditional colors.  This is certainly non-traditional for V-day.  I used Pool Party CS and Stampin' Up's Everyday Elegance DSP from the Sale-a-Bration mini.  The flowers are made from the scalloped circle punch and the Fun Flowers die cut for the Big Shot.


 The fancy edge on the card is cut with the new edgelits from the Occasion mini and the matching embossing folder.


This little treat has a peppermint patty in it.  The DSP slides right off since the ribbon is around just the DSP instead of the candy.  This was inspired by Inking Idaho, I just used different colors and put a flower on top.

Top view of the sucker holder.  I used the Two Tags die cut but folded a strip of cardstock on one end so it was a longer piece with two scalloped ends.  I made two folds in the middle so it was flat on the bottom and would hold the sucker upright.  Not sure I like this or not but I needed to put it in something that matched the rest of the pieces in this set.  : )


On the top I just punched a hole through the flower layers and threaded the stick through the base and then the flowers.