Sunday, October 31, 2010

Holiday Stamp-a-Stack

Here are the Christmas cards I've put together for my Holiday SAS!

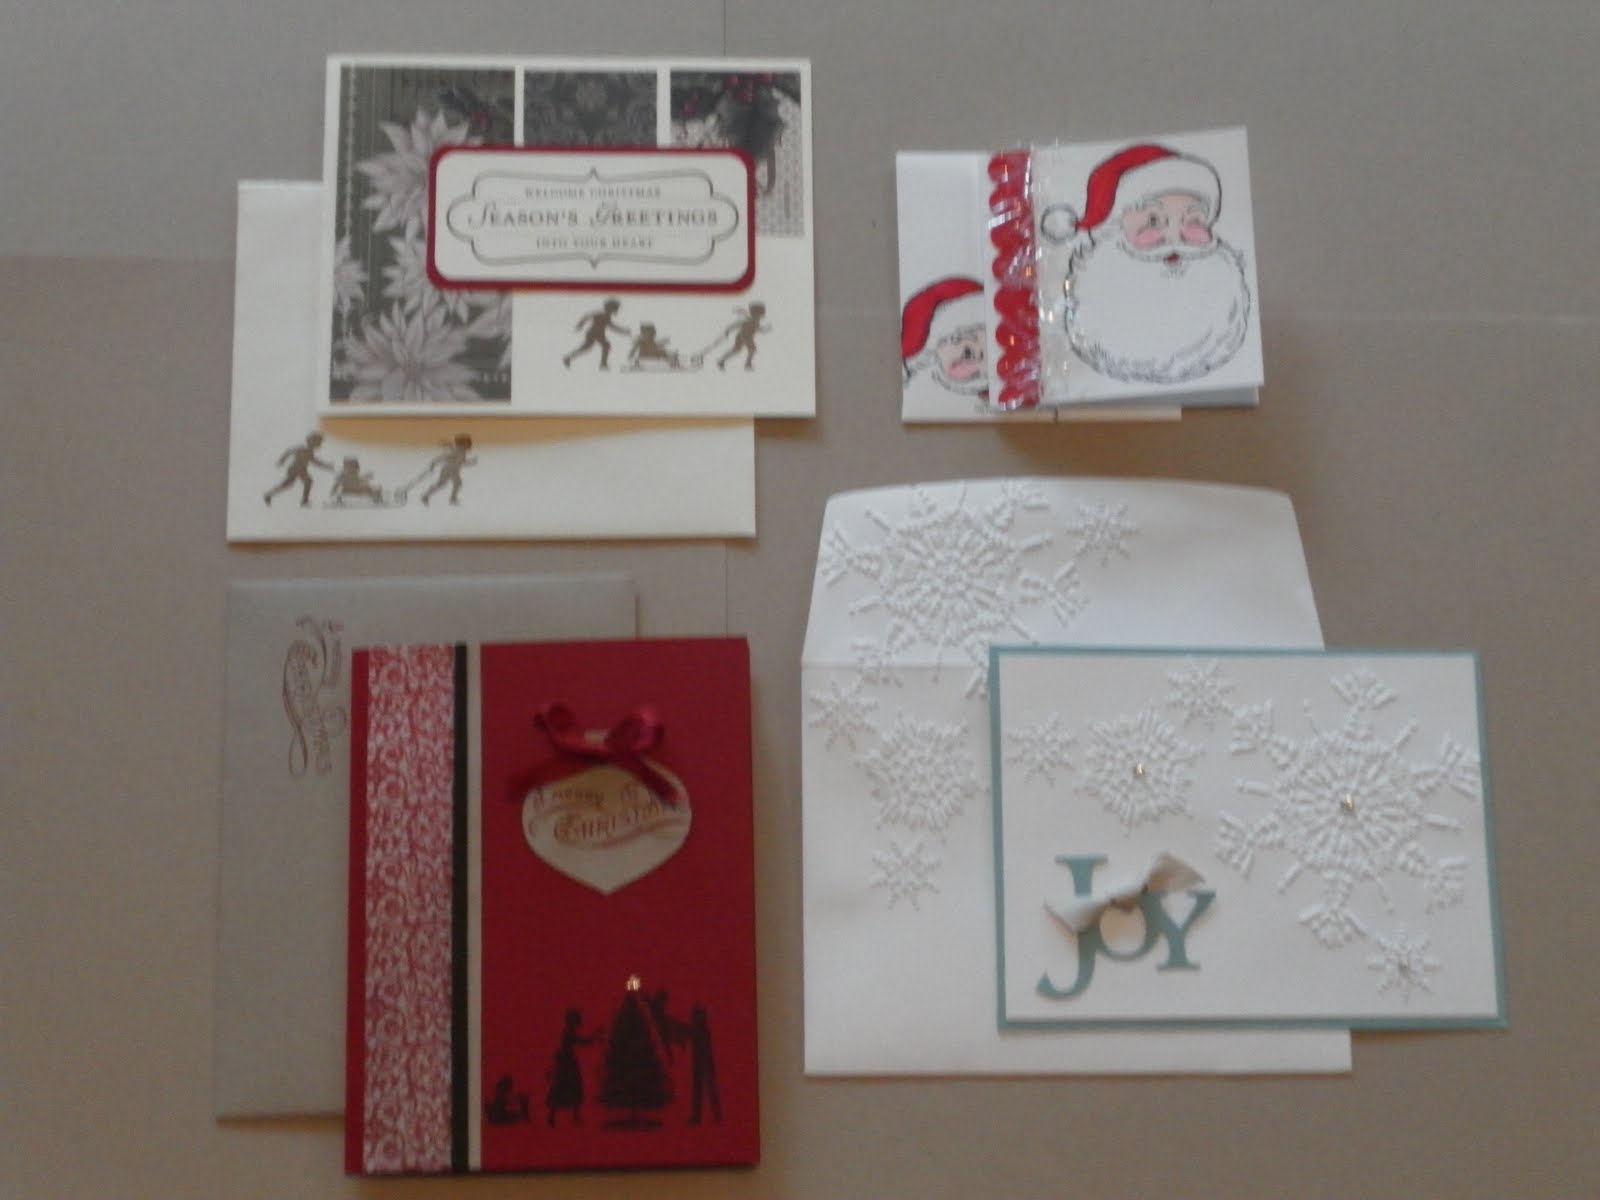
It is scheduled for Sunday, November 14th from 1-3pm at my home. Each participant will make 5 of each design plus 4 of the 3x3 Santa cards. The cost is $20. All materials are included and will be cut and ready to assemble! I have purposely chosen designs that go together quickly and easily.

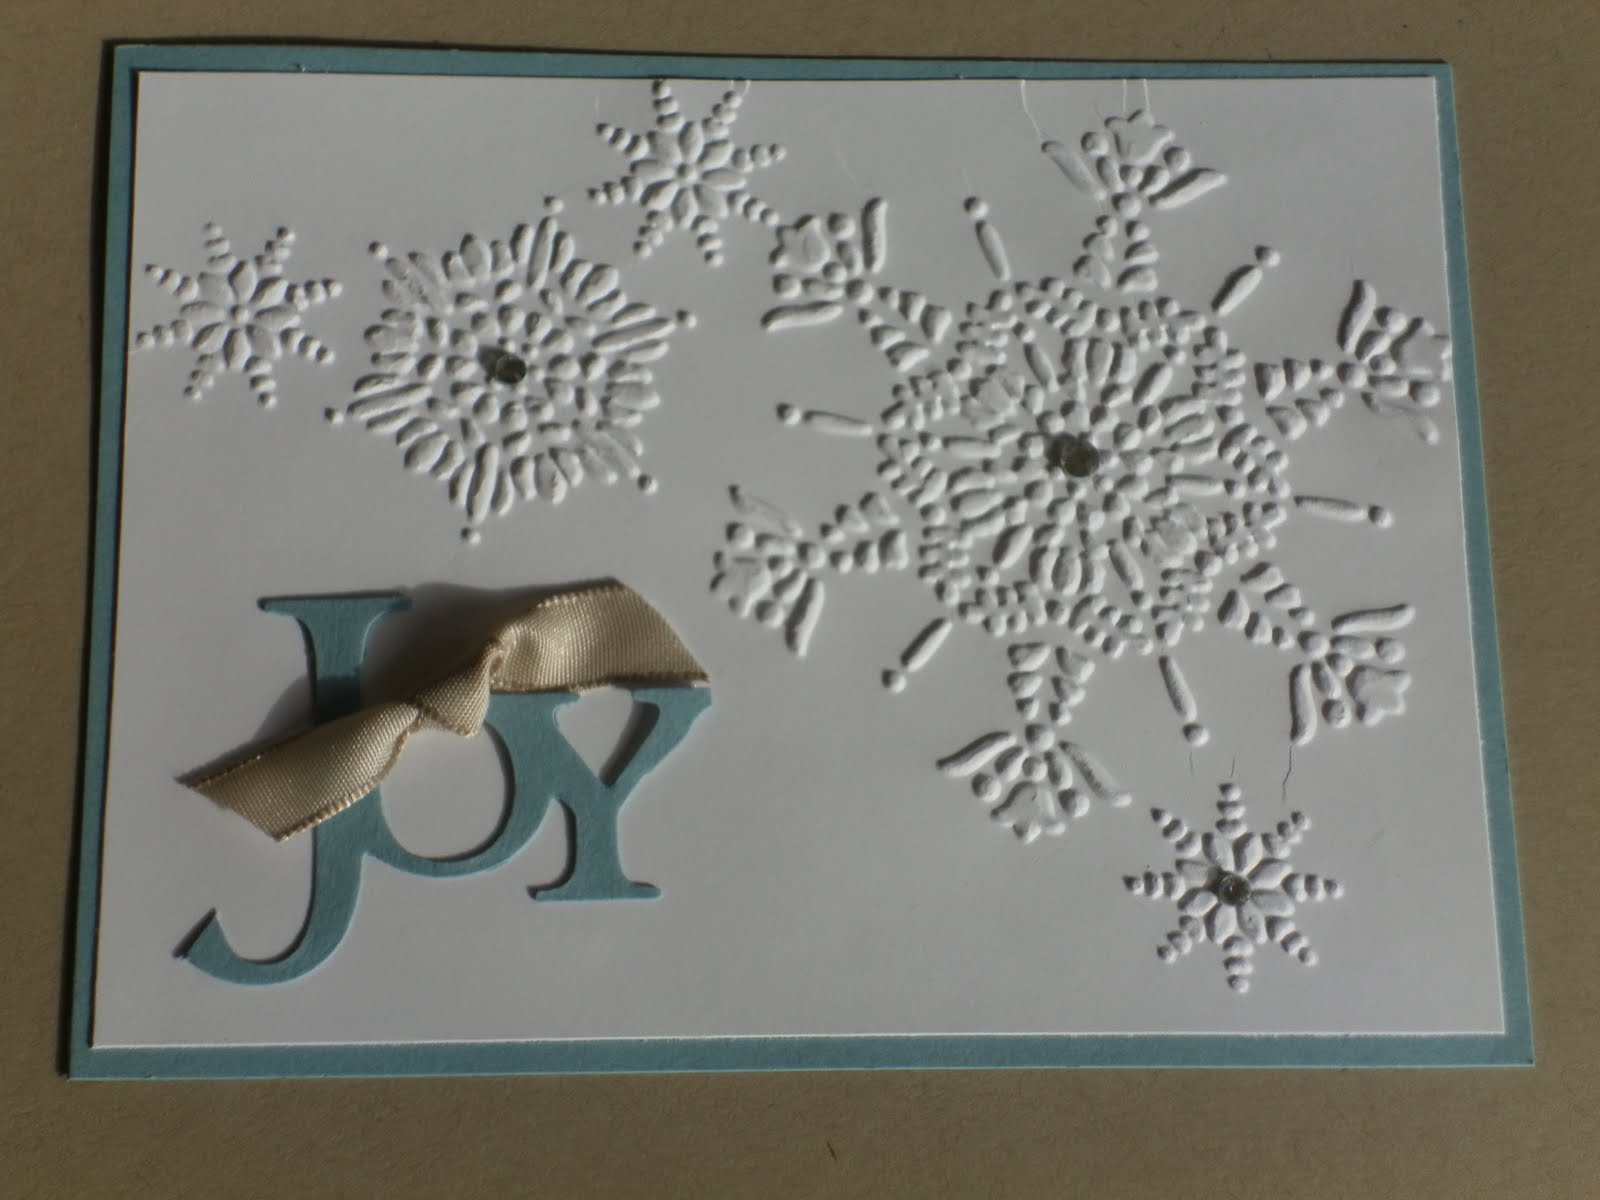
Stamp sets used are Welcome Christmas, Jolly Ol' St. Nick, and Bells and Boughs, all from Stampin' Up!. Embelishments include the new clear tinsel (fun stuff!), Northern Flurries embossing folder (used on the envelope too!), adhesive rhinestones, and the ornament punch.


And the matching envelopes of course! Let me know if you woud like to attend by Friday, November 5th via email or a comment to me here. Feel free to invite a friend!


Thursday, October 28, 2010

Happy Boo to You!

I made a bunch of these to put on my Stamp Club gals' order bags. They are made from the 2 Tags die cut and the spider web embossing folder. I used chalk with a q-tip to outline the web lines. The ghost is the owl punch turned up side down. If you put a bunch of them together they kind of look like tombstones........


Happy Halloween everyone!


Sunday, October 24, 2010

My Little Pumpkins

The other night we decided to carve pumpkins. Nothing is ever done without some shenanigans.

Here's my littlest pumpkin Sam (with no teeth)!


Here's Ben's puking pumpkin!
Happy Halloween!!

Northern Flurry Christmas


It's not even Halloween yet but I'm working on Christmas designs!! The holidays are creeping up on us and I need to get organized before I end up doing it at the last minute! This card is made with the Northern Flurry embossing folder. I used whisper white and Baja Breeze CS and Crumb Cake taffeta ribbon. The word 'Joy' is cut from the decorative strip Join in the Cheer die cut for the Big Shot.

This layout is very flexible - you could turn it several different ways and put the 'Joy' in different corners or even use 'Peace' that comes on the same die cut. I'm considering this for one of three designs for my Christmas Stamp-a-Stack. Let me know what you think!


Saturday, October 23, 2010

October Club

This month for our club project theme, we made Baby Thank You cards for Cadie. Cadie and Dan just had a baby boy last month so we thought a few thank yous would come in handy. Here is the box we put them in. It's made from 2 scallop squares, Filagree DSP and the Fox and Friends Stamp set - all from SU.
I just made a box from Crumb Cake CS and added a handle with a very vanilla brad and a circle of Marina Mist CS.

This cute little package with a bow was created by Jess and Rhea and has 6 cards and matching envelopes also made from the Fox and Friends stamp set. Below are all the cards.


Cute, Cute!

It's ELMO! Sharon made this really fun card. Love the size and the color combination!


Another WOW card from Stephanie! It's very detailed and intricate. She made it from punched circles of Marina Mist CS and DSP. The main carriage circles are cut in half and the handle is a piece cut from the border punch. The polka dot embossing folder adds the finishing touch. Pretty clever idea with the inspiration from SCS!

And the matching envelope with the polka dots too!


These are some cute and sweet cards made by Amy. She punched out a circle on the front, framed it with the scallop punch, and then put the design on the inside with the center popped up on a dimentional.


The inside - who wouldn't love getting this as a thank you?

These are the cards that I made to go in the collection. They also use the Fox and Friends stamp set.


The full collection. I hope Cade likes them!

Saturday, October 16, 2010

Before and After

Here is a photo of a huge picture frame that I redid for my stamping area. I wanted a place to put cards and projects that was organized and "contained". So this is what I did....I took the old faded picture out of its frame, flipped it around and covered it with flashing.

The flashing wasn't quite wide enough so I adhered two layers to cover everything. The white part below is the bottom of the painting that the second layer will cover.


I just used sticky tape to do this. It worked great!


The new magnet frame. I thought about using a ribbon or other embellishment to cover the splice but figured it would be mostly covered up with cards anyway.


The next photo is of the mess BEFORE I cleaned up and hung the new recycled frame.


And AFTER:


Now if I can just get some paint on the walls!!!

Thursday, October 14, 2010

Wicked!

These candy wrapper die cuts are my new favorite thing! You can put a fair amount of candy or a little trinket of some sort in these for a great gift. I used Rich Razzleberry cardstock and ink and the Wicked Cool stamp set. Love those boots! Look closely and you will see spider webs in the background.


For the ends, you have a couple different choices:
1. just fold it flat
2. double fold it or
3. fold it into a star shape.
I like the star shape at the ends since it stays together and you don't even need adhesive or have to tie the ends. The lace you see on this one isn't holding it together, it's just for looks.

Aren't these neat? We are also making this project on Monday for Stamp Club.


Spider Webs!

How creative is this!? It's a napkin that has been run through the Big Shot with the spider web embossing folder. These are soooo cool!


Here's a close up of the embossing. We are going to make these for Stamp Club on Monday. This one will win the prize for being the easiest project ever!