Wednesday, May 26, 2010

Wedding Envelope

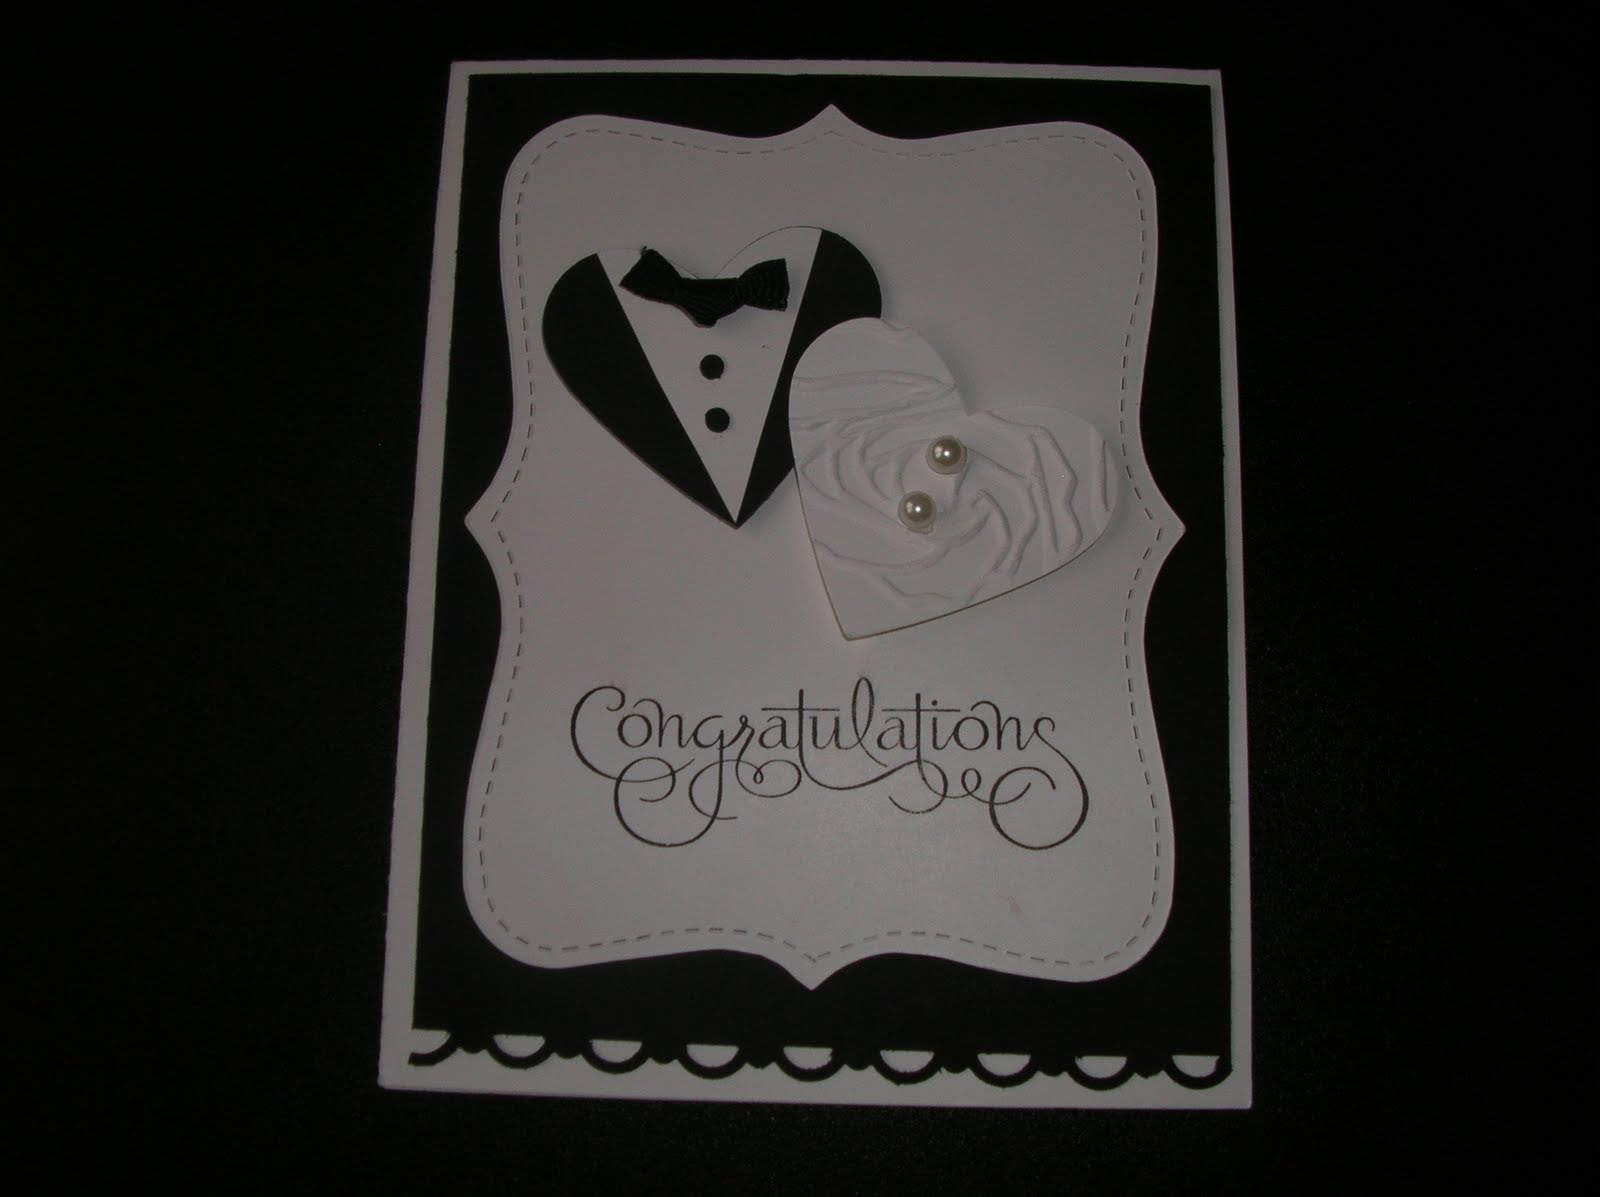
My club members will remember this wedding card we made last week. Well, after everyone left, Stephanie commented that she wanted to make a matching envelope and wondered what to do because there isn't much stamping on this card. We started thinking about it and Stephanie came up with using the rose embossing folder to match the bride's dress!


What a great idea - after a few practice runs we perfected it. We slid one side of the embossing folder inside the open envelope (the side with the raised design) and then ran it through the Big Shot. One thing we learned was not to run it all the way through because the envelope got crinkled towards the bottom edge of the envelope where the end of the embossing folder is. So - we only ran it through as far as the end of the rose design and then backed it out (crank the handle the opposite way ) to avoid the extra crinkles.


It's no secret I LOVE matching envelopes! And this is a totally new way to match!

Thursday, May 20, 2010

Paper Purse


Wowsers! Check out this purse!! Sharon ordered the pattern from Inking Idaho and made this. It looks like a real purse! Very well done - Sharon!

Club Exchange Projects


At our monthly Stamp Club on Monday, the project exchange theme was "anything kid-related". Above is a fun birthday card made by Stephanie with the Fox and Friends stamp set. Check out the background made with the Perfect Polka Dots embossing folder. The cool Sesame Street card was made by Rhea. Really nice bright colors - Both cards look very professional!


The above 3 cards were made by Valerie. Look at the muffin top - cute!


This collection was made by Kristen with the Medallion stamp. Check out the black embossed one on the right. Embossing is done by stamping with Versa Mark then putting embossing power on it and then heat setting it with a heat tool. It creates a raised image that's shiney.


These cards were made by 12-year old Zoe, Stephanie's daughter. She's following in her mother's footsteps....very cute - check out the tulip flowers made from the bird punch wings!


Cute gumball machines! This matching card and gift was made by Cadie. The inside of the card had gumballs lining the edge. Nice touch!


The two matching baby cards and envelopes were made by Sharon. She was thinking! One in pink and one in blue. The recipient is ready for any baby shower now! The giraffe card was made by Jess. It has a circle punched out of the top and then when you open the card, the giraffe is actually adhered to the inside. I love all the matching envelopes!


The onesie card was made by LaReatha - Love the buttons on the bottom! The baseball card was made by Kristen - like the red, white, and blue - very American like baseball and apple pie!


Wednesday, May 12, 2010

Husband and Wife

There are a few varieties of this wedding card floating around SCS and other blogs. I love this idea with the hearts! I changed it up and added the Top Note and stamped Congrats on it. The swirly words and the edges of the Top Note seem to go together well. The tuxedo is a combination of 2 hearts, one white that is cut into a 'V' shape, and the black heart which the white heart (V) is mounted onto with a ribbon tie and 2 buttons (small hole punch circles). For the bride, I ran the heart through the rose embossing folder to give it a textured look and added a couple of half pearls.


Couldn't decide if I liked the scalloped trim on the bottom of the black mat or just the rounded corners on all 4 corners. Hubby says no guy would like the "frilly" bottom part. It almost reminds me of fishnet stockings.
Which one do you like better? Leave me a comment here!! We will be making this at Club on Monday!

Monday, May 10, 2010

It's Graduation Time!


Love this stamp set - Go Graduate! and the grad hat flying up with the loop! Fun! I pretty much CASED this card from the new Summer Mini, just changed the size of the card and added the hat!

What? A flashing!?


These little centerpieces are made out of flashing. Yup- the aluminum used for roofing is called 'flashing'. You may have seen these on SCS. They are about the quickest thing I've made in months! Just run the flashing through the Big Shot with the Flower Folds die, put a glue dot under each layer and you're done! I put a little tea light in the center but you could put a larger candle in there if you'd like.


Are the edges sharp? No, not really - it's folded slightly around the edges when it's run through the Big Shot, and I've handled the pieces quite a bit without a problem. Club gals - we are going to be making these for Stamp Club on Monday.


You can see how big it is compared to my hand, it's only about 5" across. I bought the flashing at Home Depot. It comes in a roll that's 6" by 10 feet which is perfect to run through the Big Shot!

I hope all you moms had a great Mother's Day! This is a picture of my mom and me celebrating Mother's Day. Below is a picture of my mom and my little goofballs! And yes, I gave Mom a special handmade card : D


Saturday, May 8, 2010

What a pansy!


Here are some pansies that I'm experiementing with. There are a lot of different ones on SplitCoast right now. Any guesses as to which punch was used? It's the butterfly punch! The dark one on the bottom was the easiest to make, just punch out 3 butterflies, add a yellow flower in the middle and put a brad through all the layers.

The top left was my next attempt. I "drug" the white butterfly across the ink pad, leaving some white in the middle then used the YoYo Yellow marker to fill it in. I liked it but thought that something was missing. Then I decided to try my new stamp set "Garden Greetings" and add the center stamped image you can see in the middle pansy. Then, I made one more attempt to "better" it. It seemed like the ink was too heavy and so when I drug the one on the right across the ink pad, I left some white spots. This seems to look better and more realistic. What do you think? Each one is going to look different regardless of technique - just like nature.


Here's a pansy on a card. I originally meant to have the card vertical but then thought that I'd try something different and put it on horizontally.


This little flower card was a sinch! (or is it cinch?) I just put a folded piece of cardstock through the Big Shot using the flower folds die, and made sure that the fold was just under the tip of one petal. See the flat petal on the top? This way it's a card and has a fold! I have to give credit for this idea to Inking Idaho's blog.


Have a great Saturday!


Thursday, May 6, 2010

Hello Baby!


The Perfect Polka Dot embossing folder is perfect for baby cards! I got this idea from the SU website, made a pattern and added a few details. This is very similar to the onesie baby card that many of us have made. The collar is made by punching out the neckline and then framing it with the scalloped circle that's also had the center punched out.


And what's a handmade card without a special envelope?


I made this to go with a gift for a baby shower for a gal at work. She is due to have a little girl in just a couple of weeks!

Wednesday, May 5, 2010

Smooch Spritz!

Above is a card made with the new Elements of Style stamp set from the just released Summer Mini Catalog. It's very - classy - it looks complicated but all I did was color it in with markers. No blender pen or water coloring! I used Close to Cocoa and Pretty in Pink cardstock. This first picture is BEFORE I spritzed it.


This picture is AFTER I used the new Log Cabin (chocolate) Smooch Spritz. Ooops! I got more on it than I had wanted so I guess I will have to practice and hold the bottle back a little bit farther. The Log Cabin Spritz has a sparkly bronze look to it.


Below is another stamped image with the Vanilla Smooch Spritz. I tried to take a photo of it so it would show the little sparklies but it just doesn't do it justice. The Smooch Spritz is like a fine glitter spray and comes in a slim glass spray bottle.


I'm really liking the vanilla spritz to add just that "little something" to a project!


Sunday, May 2, 2010

Lockets and Chains

Yikes! It's been a whole week since I've posted! It seems like spring is coming all at once, and there's so many things to do at work and at home! Anyway, here's a new post:


We had the Mother's Day Stamp Class today and above are some awesome inserts that Stephanie made for her 1 x 1 1/4" locket. This size locket has a beveled glass face. Love the details on her inserts! Look closely at the top right insert - it has a textured butterfly on it!


These are some 5/8" square inserts that Cadie made and then put in a plastic holder. She used a repositional tape runner to make the back somewhat sticky so they wouldn't slide around. The plastic is cut from a full sheet of baseball card holders. Check out the fun high heels!


That's it folks - time to get ready for yet another Monday morning!
Amy